How to perform a Backup and Restore of a
Microsoft SQL Server database
Microsoft
SQL Server Database Backup
Microsoft
SQL Server Database Restore
Overview
This document describes the steps
necessary to perform either a backup or a restore of a Microsoft SQL Server
database. These instructions apply to Microsoft
SQL Server versions 2005 and greater. Database backups are forward compatible,
but not backward compatible. This means
that a backup created in version 2016 can be restored
to version 2019 database, but a backup created in version 2019 cannot be
restored to a version 2016 database. Backups and Restores require access to the
SQL Server Management Studio application as well as a database account that has
permission to perform database backups and restores. In addition, backups and restores can only
use drives, folders and files that are physically located on the SQL Server
where the backup or restore is being done (like the C: or D: drives). This means that you cannot do a backup to a
network drive and you cannot restore from a database backup file that is on a
network drive. So any files that are
going to be used to do a database restore should be copied a local drive of the
SQL Server before the restore process is started.
Microsoft SQL Server Database Backup
1.
Open SQL Server Management Studio and connect to the database server where the
database you want to backup is located
2.
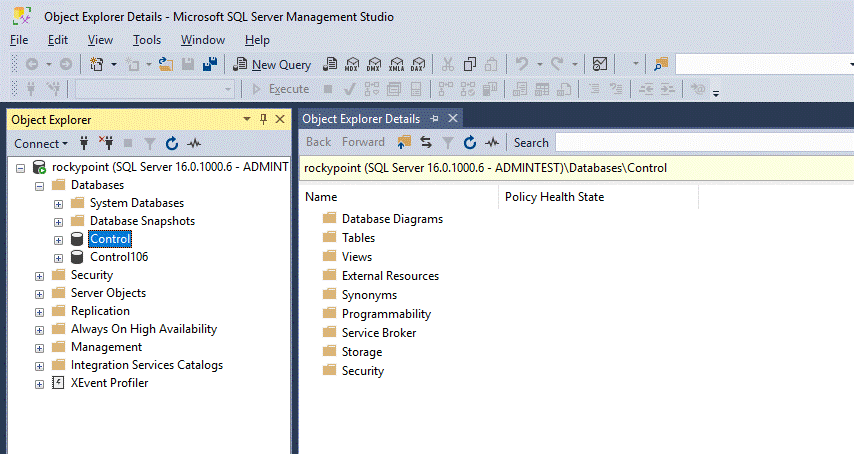
Select the Databases tree and open it.
3.
Select the Database you wish to backup.
4.
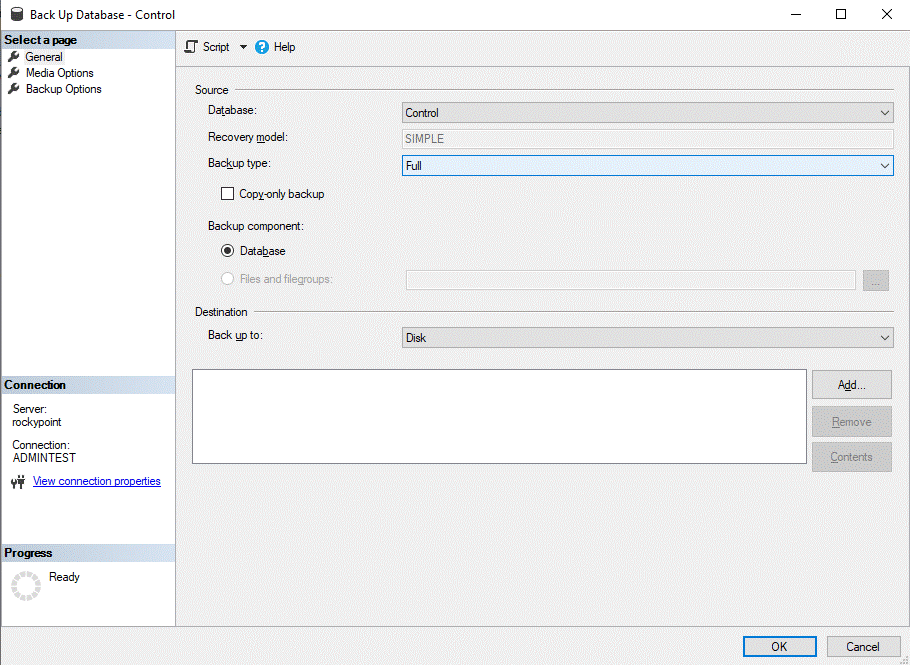
Right click and select "Tasks" then "Back Up..." This will bring up the Back Up Database dialog.
5.
If any devices are listed in the Destination section,
highlight them and then click the Remove button.
6.
Click the "Add..." button. This
will bring up the “Select Backup Destination” dialog. If you know the exact location and filename that
you wish the backup to go to, enter it in the File Name field.
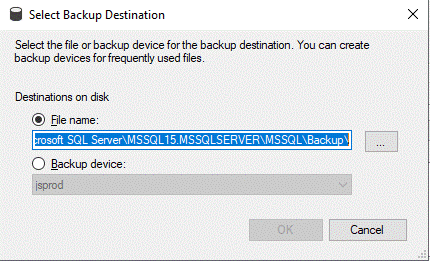
If
you do not know the exact location for the backup, click the "..."
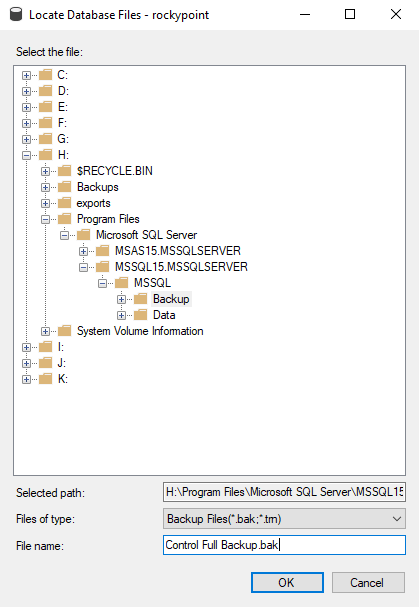
button. This will bring up the "Locate Database Files" dialog that
will list all the local drives on the SQL Server where you are performing the
backup. Browse to the folder you wish to
use, and if there is a file that you wish to use, select it in the folder browser. If not, enter the name of a new backup file
in the
"File
name" field and click OK once you are done.
7.
This will take you back to the "Choose Backup Destination"
dialog. Click OK here to confirm your
backup destination.
8.
Select the "Media Options" option tab page from the Select a page
control. On the Media Options tab page
make sure that the “Overwrite all existing backup sets” check box is checked.
9.
Select the "Backup Options" option tab page from the Select a page
control. On the Backup Options tab page,
set the “Set backup compression” option to “Compress backup” unless you are
sure that the server default for this option is already enabled.
10.
Click OK to start the backup process. The
progress indicator in the “Back Up Database” dialog will
indicate the progress of the database backup.
11.
If the backup failed, correct the problem and retry the backup.
Microsoft SQL Server Database Restore
1.
Open SQL Server Management Studio and connect to the database server where the
database you want to restore is located
2.
Select the Databases tree and open it.
3.
Select the Database you wish to restore.
4.
Right click and select "Tasks" then "Restore” and then “Database..." This will bring up the
Restore
Database dialog.
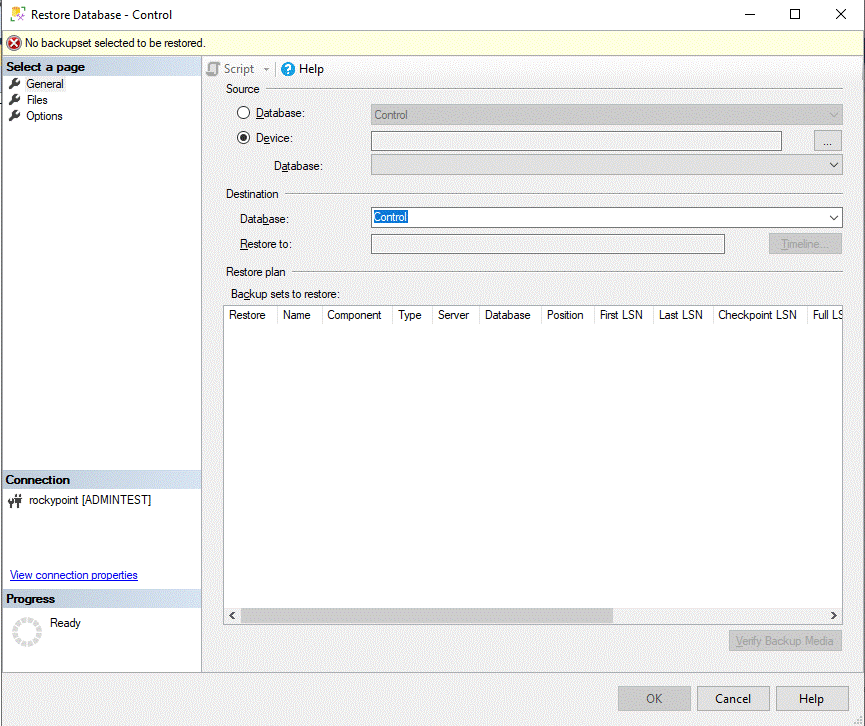
5.
Select the "From Device" radio button.
6.
Click on the "…" command button.
This will bring up the “Select backup devices” dialog.
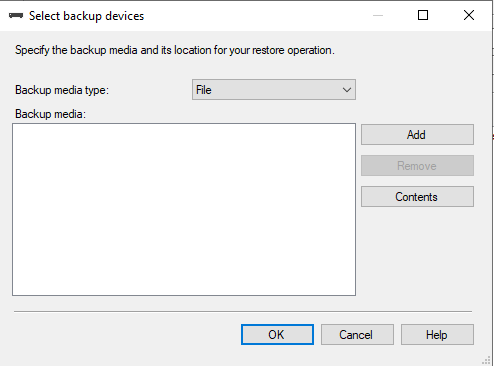
7.
Click on the "Add" button.
This will bring up the “Locate Backup File” dialog.
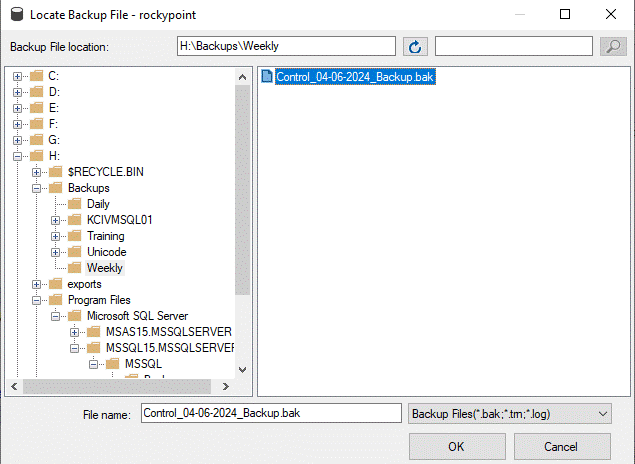
8.
If you know the name and location of the backup file, enter it in the
"File Name" field. If not,
select the backup file you wish to restore from and click OK. Then click OK to close the "Select backup
devices" dialog.
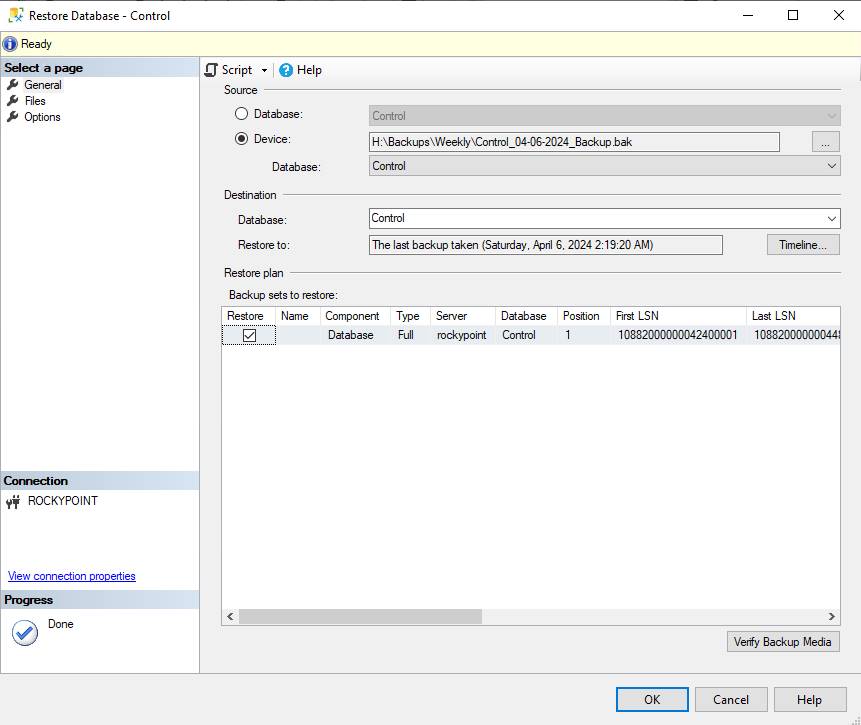
9.
The file you selected should now be listed in the list
of backup sets to restore. Check the
checkbox in the “Restore” column for the file that you just selected.
10.
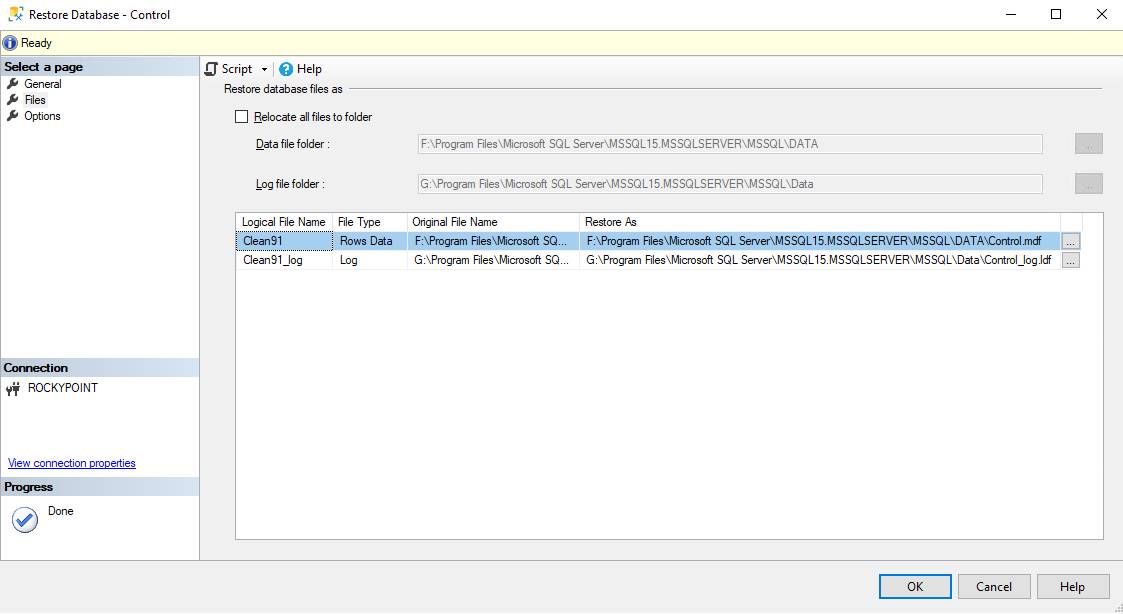
Select the "Files" option tab page from the Select a page
control.
11.
It may be necessary to modify the file names of the database files under the
"Restore As" field if the file names and locations from the remote
server where the backup was done do not match the name
and locations on the server where the restore is being done. To modify a field, simply click on the field
with the mouse pointer. This will allow
you to edit the field. You can also
click on the “…” button to bring up the “Locate Database Files” dialog which will let you specify the database file to
use. If necessary, change the location
and name of the files to match the local server. You can leave the Logical file names
unchanged.
12.
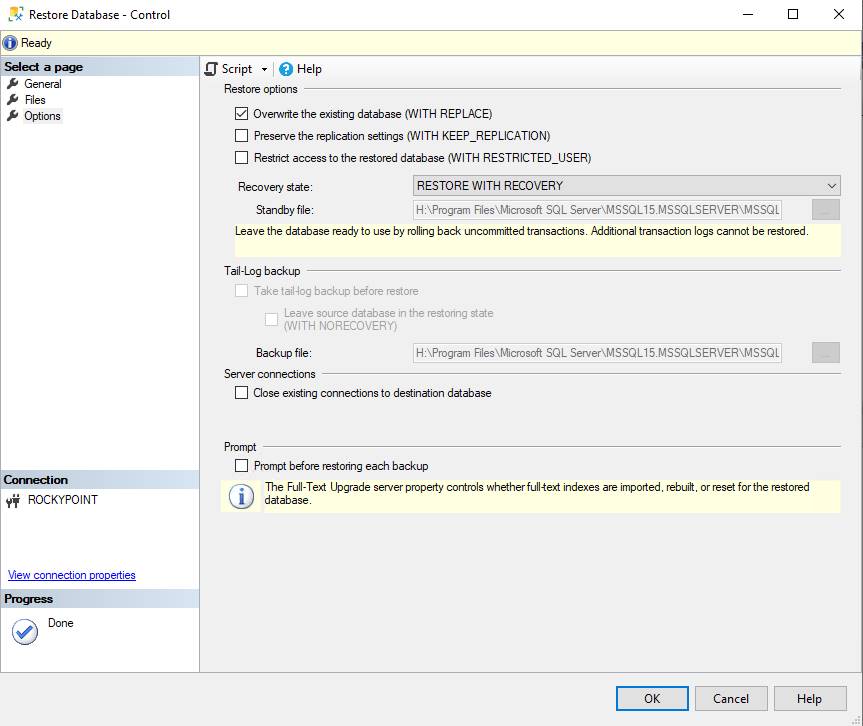
On the Options tab page, check the "Overwrite the existing database"
option.
13.
Press the "OK" button to start the restore. The progress indicator in
the “Restore Database” dialog will indicate the progress of the database
restore.
14.
If the restore failed, correct the problem and retry the restore.
15.
If you are restoring a database backup from the same SQL Server, the restore
process is complete. If you are restoring a database backup from a different
SQL Server then you need to perform one additional step to resync the CNTADM
database account. First, open a new query window by right clicking on the
selected database and selecting "New Query". This will bring a new query window for the
selected database.

16. In the query window enter the following command:
sp_change_users_login 'Auto_fix',
“CNTADM”
Then
click on the “Execute” button in the menu bar to execute the command. You should see a message telling you if any
modifications were made.
17.
The database should now be fully restored.